http://twobrutal.co.uk/TBforum/showthread.php?t=1068
anyway, I started work on the radiator relocation today. the radiator I'm using is an SW20 turbo one, it's practically identical to the aw11 one, with a couple of minor differences on the end tanks
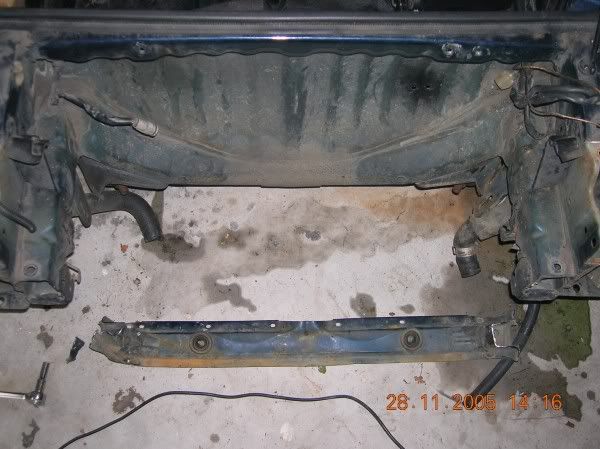
First thing I did was to cut off the old, damaged radiator support beam. I don't think this is going to affect chassis strength at all, as I don't feel this is a structural member. Anyway, , before:
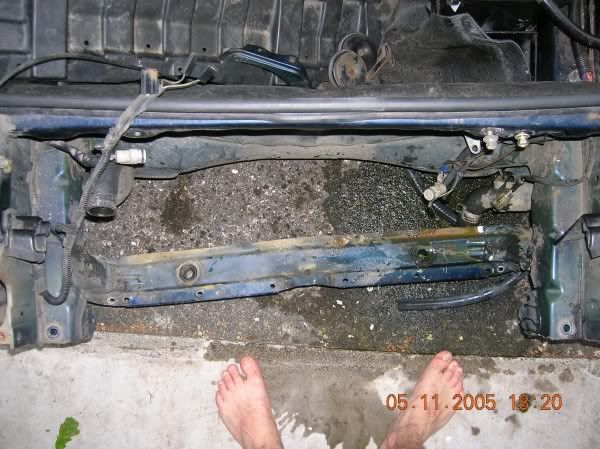 (click to enlarge)
after (weight reduction stage one
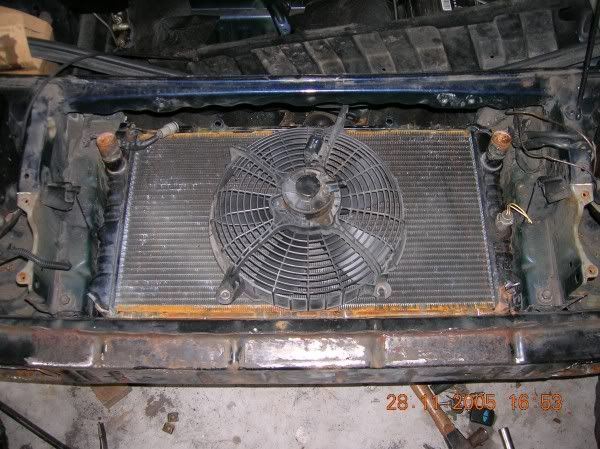
then I test fitted the radiator and cut a nice big hole in the panel behind. I was going to use the original twin fans but decided they were overkill - there will be plenty of airflow when the car is moving, and a single fan is plenty to keep it cool while idling/driving slowly. This single fan is much lighter and should allow much better airflow when the car is moving
(weight reduction stage 2
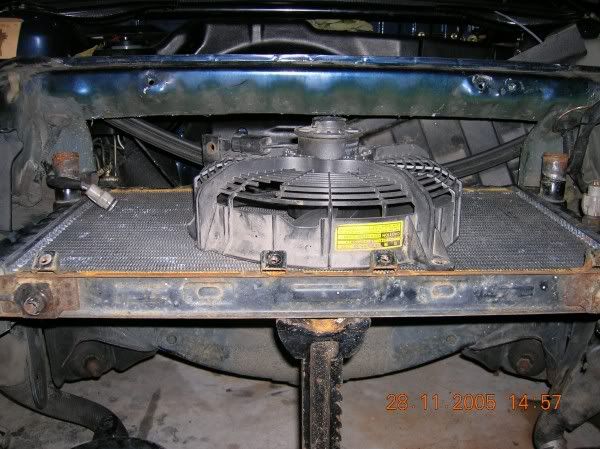
You might think the hole is small, compared to the size of the radiator, but remember the radiator has a lot of tubes and fins, so the cross sectional area available for flow will be much smaller than the radiator itself. Also this hole is about the same size as the opening in the front bumper.
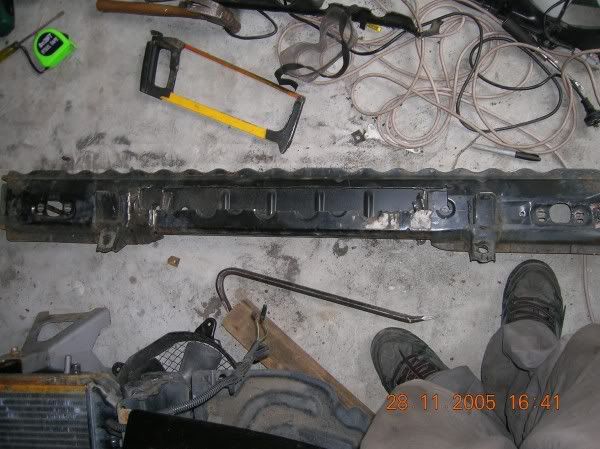
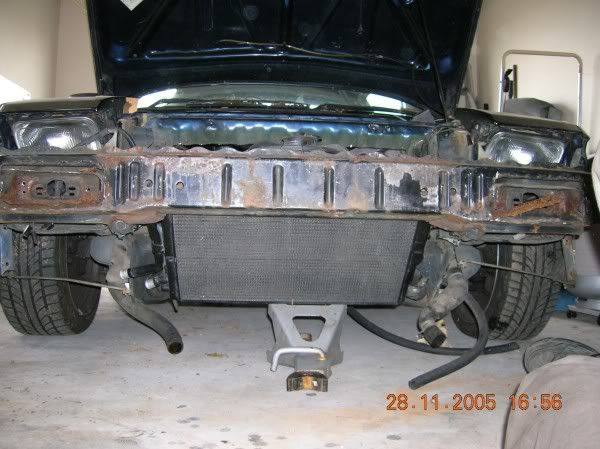
anyway the next step was to cut a slot into the bumper support beam to allow it to fit on. This also supports this end of the radiator. I was going to put a panel inside the slot with the round rubber supports that the bottom "pins" on the radiator normal go into, but I might just surround the whole thing with some dense foam rubber to hold it.
Beam (weight reduction stage 3
Beam installed:
next I test fitted the water to air radiator, to see where it can go. I think here should work very well, and it shouldn't pick up any heat from the much hotter radiator above like this either
I was going to relocate the bonnet latch, but I test fitted the panel and realised it could still fit quite easily. I just had to trim the bottom tab off the latch and some of the plastic grille off the fan (weight reduction stage 4

next I need to work on ducting, and the bonnet vents, which is going to involve making a fibreglass bonnet, which should be an interesting experience.


